
[GA4] How to track Checkout Journey in Google Analytics 4 with Data Layer
In my previous article, I explored the mechanism by which Google Analytics 4 (GA4) measures user interactions using Events and DataLayer. This time, I will use Google Merchant Store as an example, to examine how GA4 records user interactions with Events during the product checkout process and identify the information that must be conveyed through the DataLayer to GA4.
This article is intended for digital marketers who wish to comprehend the implementation of the GA4 DataLayer. Should you have any questions regarding Events and the DataLayer, I encourage you to revisit my earlier article.
Typically, this is what happens when a user enters your site to engage in purchase behaviour. At each step, the GA4 event representing the associated step in the checkout process will be triggered as well.
Throughout the GA4 events, you can understand the funnel in the GA4 report.
- Visit the PDP via Promotion – User checks top offers on the homepage. (or Step 2)
- Visit the PDP via Navigation – User goes straight to product list using the navigation bar. (or Step 1)
- Browse Products – User looks at the list of products.
- Product Interaction – User views product details and adds to basket or wishlist.
- Review Basket – User checks items in the basket.
- Enter Delivery Info – User fills in delivery details.
- Enter Payment Info – User enters payment details.
- Successful Purchase – Payment goes through, and purchase is complete. (or Step 9)
- Failed Purchase – Payment fails, and purchase isn’t completed. (or Step 8)
- Post-Purchase – User may request a refund if unhappy with the product.
Please find the step-by-step explanation here:
Step 1. Visit the PDP via Promotion – User checks top deals on the homepage. (or Step 2)
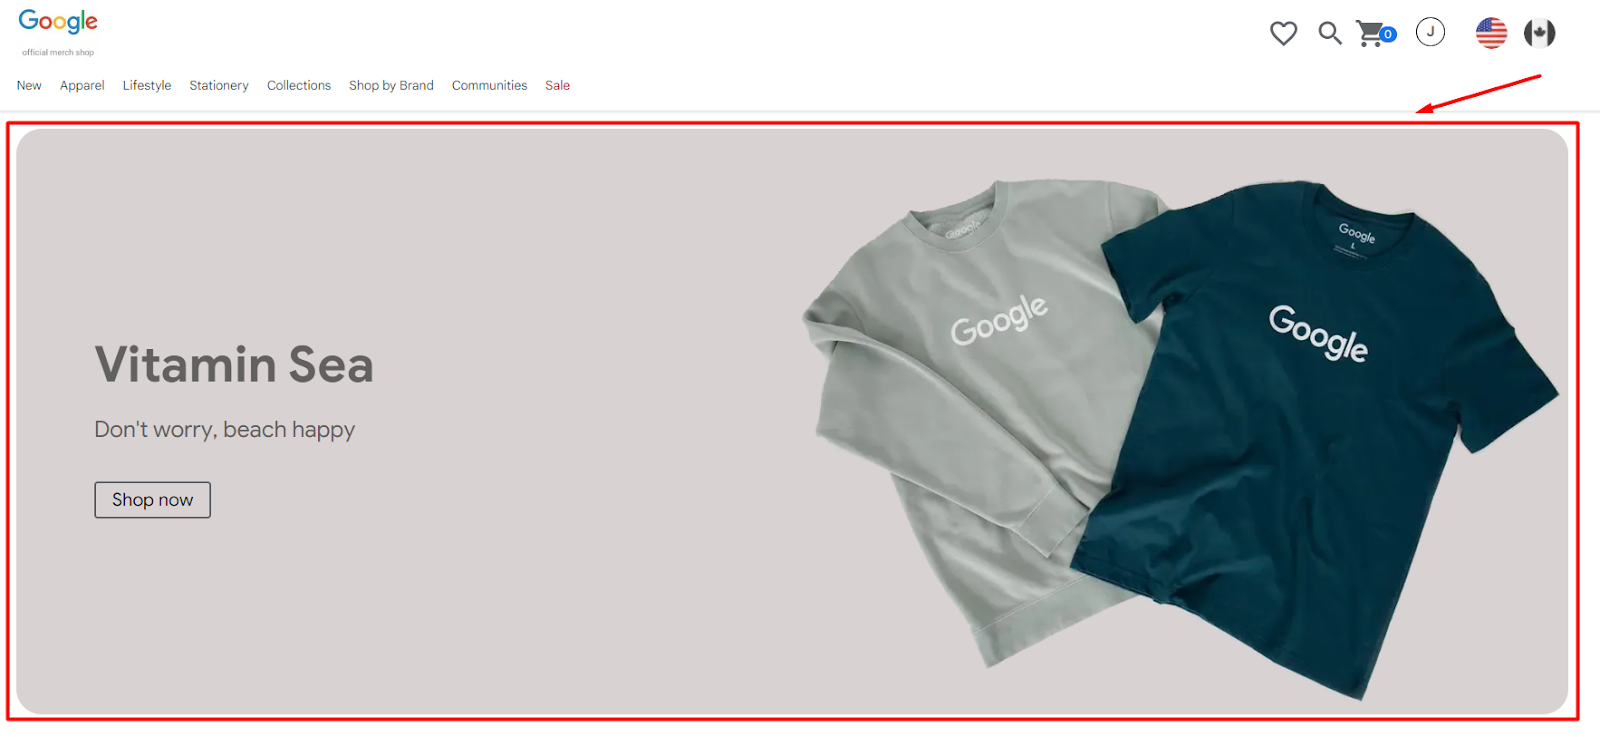
Page: https://shop.merch.google/
To begin with, when a user visits your webpage and your product banner appears, an event called view_promotion should be triggered.
If the user clicks on the promotion banner to find out more, another event called select_promotion should be triggered as well.
With both events having the same DataLayer structure, you can measure the click-through rate (CTR). And you will know which promotion banner is more popular than the others.
Here is a sample DataLayer for the “view_promotion” event:
window.dataLayer.push({
  "event": "view_promotion",
  "ecommerce": {
    "promotions": [
      {
        "id": "PROMO_1234",
        "name": "Summer Sale",
        "creative_name": "Banner_1",
        "creative_slot": "slot_1",
        "location_id": "homepage_banner"
      }
    ]
  }
});
Step 2. Visit the PDP via Navigation – User goes straight to product list using the navigation bar. (or Step1)
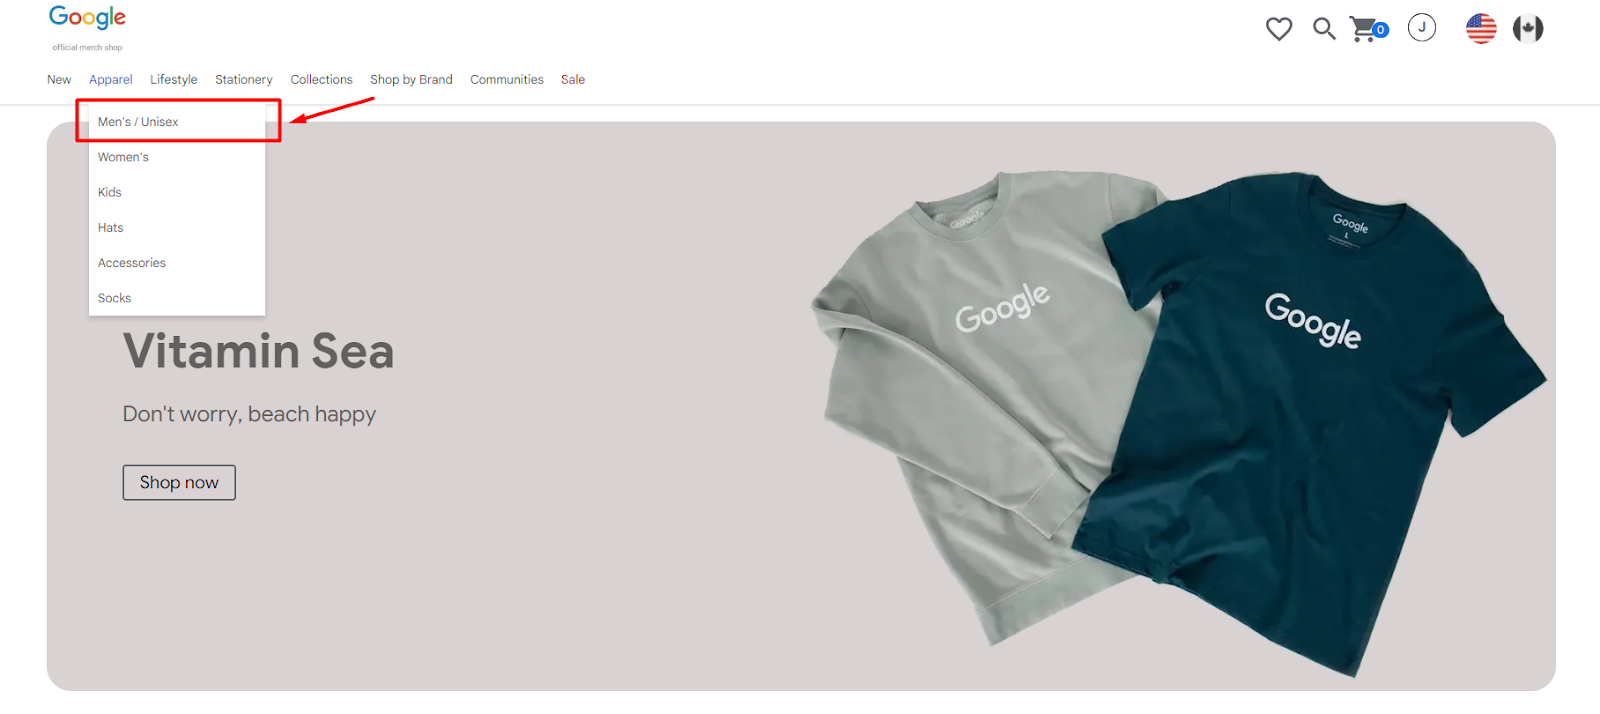
Page: https://shop.merch.google/
Or, if the visitor already knows what they want and directly selects the product category on the navigation bar, an event called “navigation_click” should be triggered after users have selected a product category.
While this is not an official ecommerce event by Google Analytics 4, I recommend businesses implement this for comprehensive tracking.
window.dataLayer.push({
  "event": "navigation_click",
  "navigation_category": "Apparel",
  "navigation_category2": "Men’s / Unisex"
});
Step 3. Browse Products – User looks at the list of products.
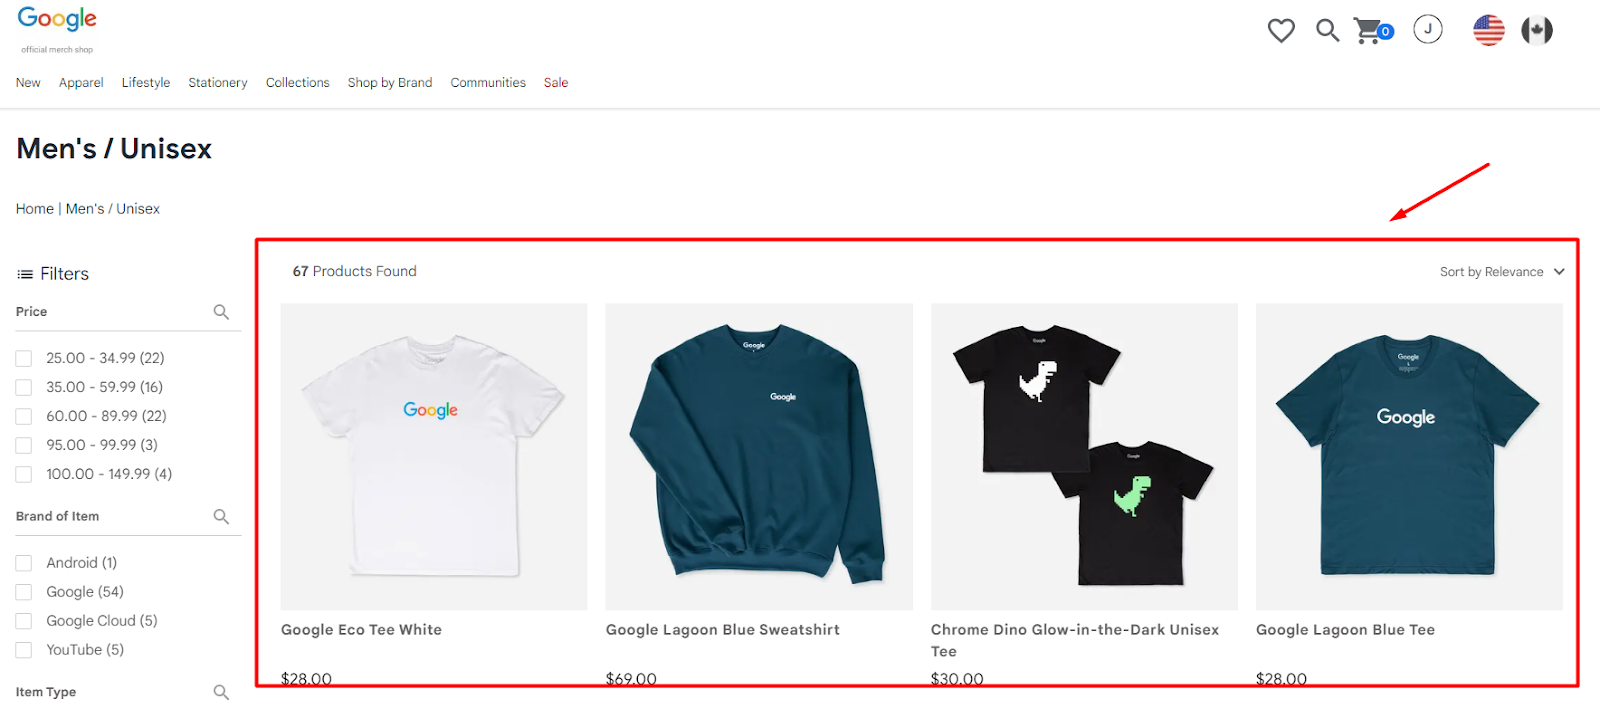
Page: https://shop.merch.google/shop/apparel/mens
No matter which method the user uses to view the listing page, an event called view_item_list should also be triggered once the product list is displayed.
If the user clicks on a product to visit the product detail page, another event called select_item should be triggered as well.
With both events having the same DataLayer structure, you can measure the click-through rate (CTR).
Here is a sample DataLayer for the “view_item_list” event.
*Please note that multiple items can also be pushed with their information simultaneously in the same item array.
// Clear the previous ecommerce data
window.dataLayer = window.dataLayer || [];
window.dataLayer.push({
  ecommerce: null
});

// Push view_item_list event with relevant data
window.dataLayer.push({
  "event": "view_item_list",
  "ecommerce": {
    "item_list_id": "mens_unisex",
    "item_list_name": "Men’s / Unisex",
    "items": [
      {
        "item_id": "SKU_12345",
        "item_name": "Stan and Friends Tee",
        "affiliation": "Google Merchandise Store",
        "discount": 2.22,
        "index": 0,
        "item_brand": "Google",
        "item_category": "Apparel",
        "item_category2": "Adult",
        "item_category3": "Shirts",
        "item_category4": "Crew",
        "item_category5": "Short sleeve",
        "item_variant": "green",
        "location_id": "product_listing_page",
        "price": 10.01,
        "quantity": 1
      },
      {
        "item_id": "SKU_67890",
        "item_name": "Google Logo Hat",
        "affiliation": "Google Merchandise Store",
        "discount": 1.50,
        "index": 1,
        "item_brand": "Google",
        "item_category": "Accessories",
        "item_category2": "Adult",
        "item_category3": "Hats",
        "item_category4": "Caps",
        "item_category5": "Adjustable",
        "item_variant": "black",
        "location_id": "product_listing_page",
        "price": 15.00,
        "quantity": 1
      }
    ]
  }
});
Step 4. Product Interaction – User views product details and adds to cart or wishlist.
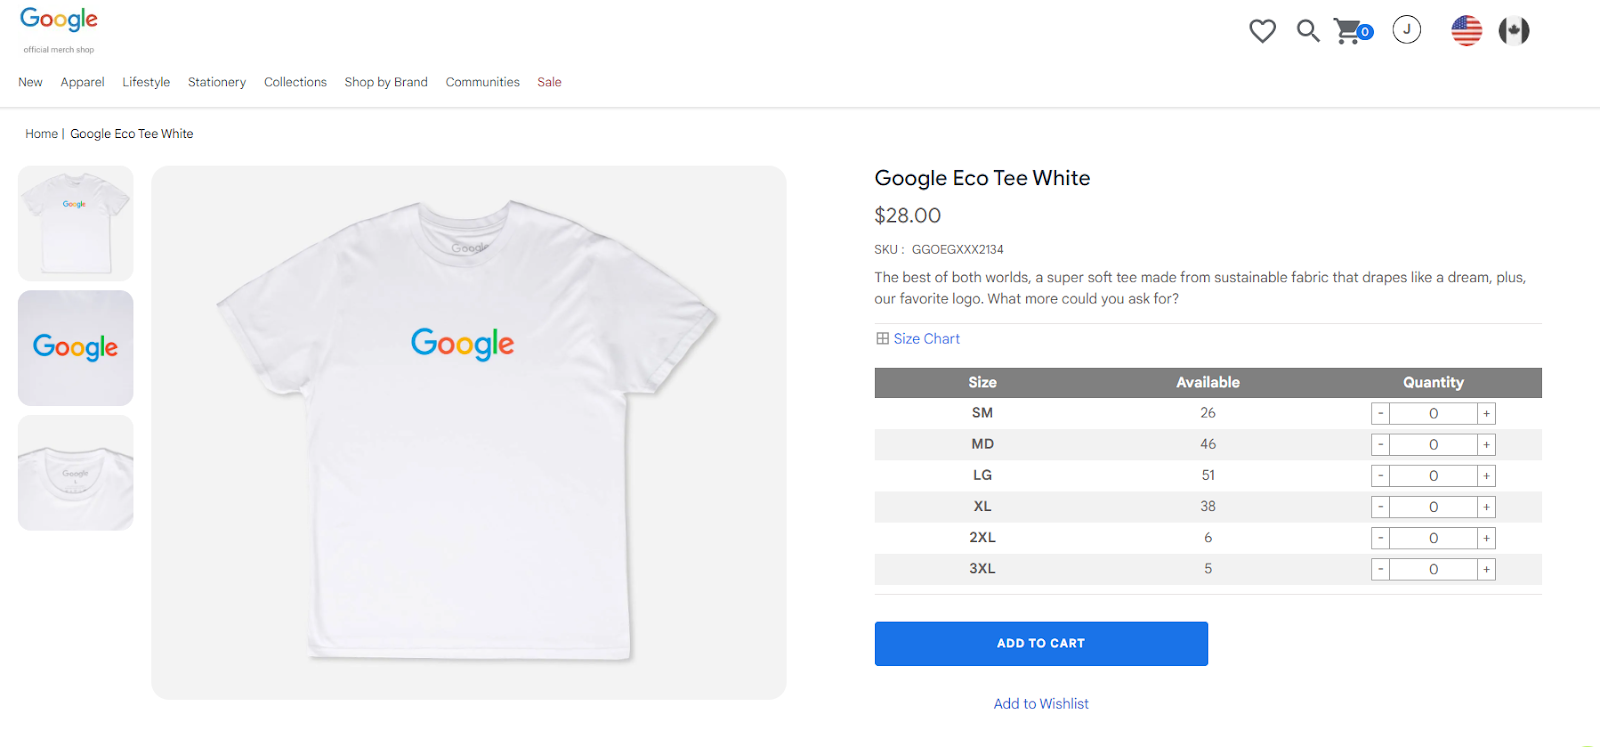
Page: https://shop.merch.google/product/google-eco-tee-white-ggoegxxx2134
When the user visits the product details page (PDP), an event called view_item should be triggered once the page is loaded with product information.
If the user clicks the “ADD TO CART” button, an event called add_to_cart should be triggered;
Similarly, if the user clicks the “Add to Wishlist” button, an event called add_to_wishlist should be triggered.
With all three events having the same DataLayer structure, you can measure the cart-add-through rate or wishlist-add-through rate.
Here is a sample DataLayer for the “add_to_cart” event.
// Clear the previous ecommerce data
window.dataLayer = window.dataLayer || [];
window.dataLayer.push({
  ecommerce: null
});

// Push add_to_cart event with relevant data
window.dataLayer.push({
  "event": "add_to_cart",
  "ecommerce": {
    "currency": "USD",
    "value": 28.00,
    "items": [
      {
        "item_id": "SKU_12345",
        "item_name": "Google Eco Tee White",
        "affiliation": "Google Merchandise Store",
        "discount": 0,
        "index": 0,
        "item_brand": "Google",
        "item_category": "Apparel",
        "item_category2": "Adult",
        "item_category3": "Shirts",
        "item_category4": "Crew",
        "item_category5": "Short sleeve",
        "item_variant": "SM",
        "location_id": "product_detail_page",
        "price": 28.00,
        "quantity": 1
      }
    ]
  }
});
Step 5. Review Cart – User checks items in the cart.
*This step often sees the highest dropout rate as users may leave to browse other pages.
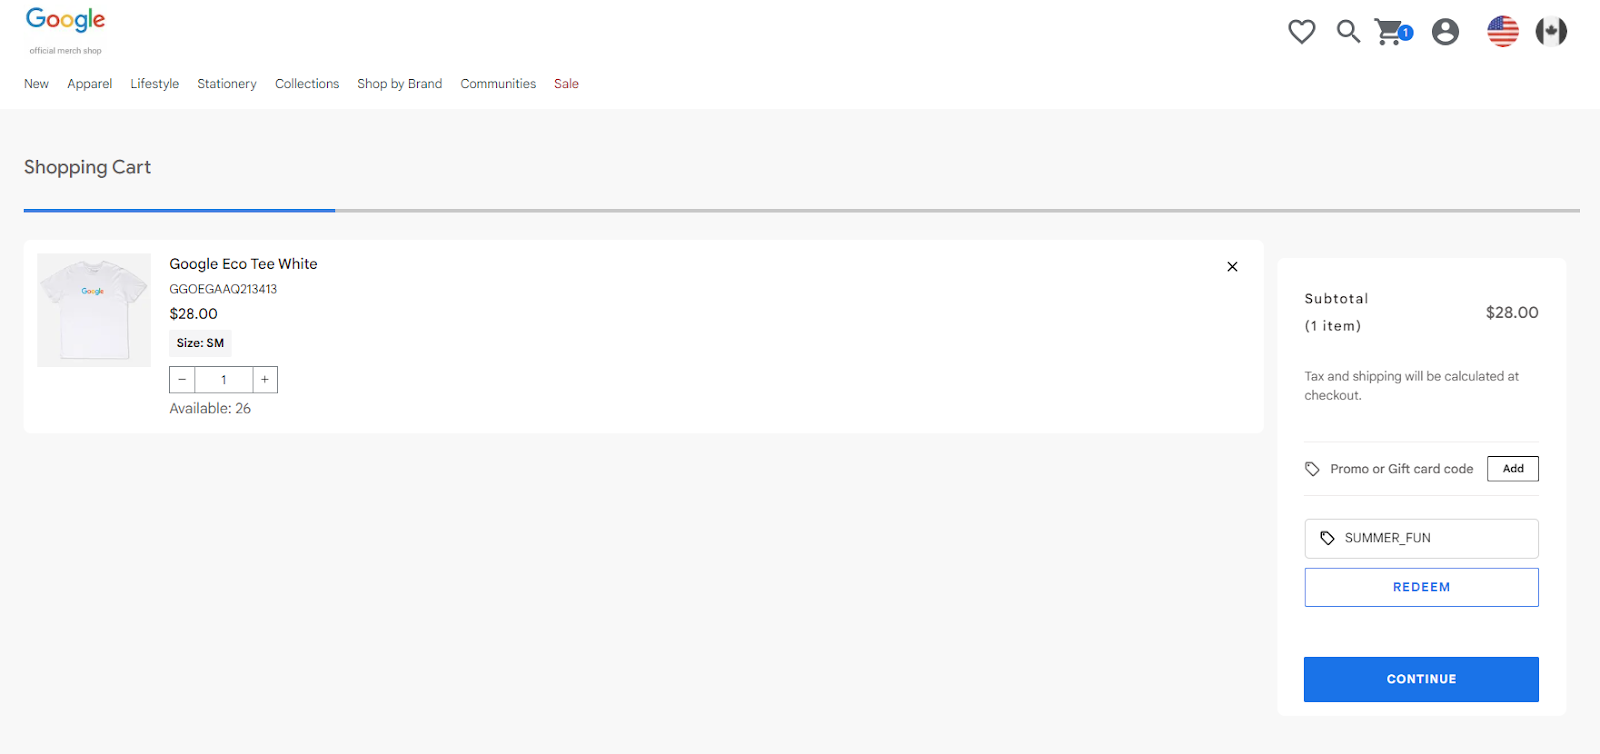
Page: https://shop.merch.google/checkout?show=basket
When the user visits the cart, an event called “view_cart” should be triggered once the cart page is loaded.
If the user decides to adjust the quantity or remove an item from the cart, the following events should be triggered:
- add_to_cart when an item is added.
- remove_from_cart when an item is removed.
*If you have passed the location_id information (e.g., cart_page), you will be able to understand where the product was added or removed.
If the user clicks the “CONTINUE” button, an event called begin_checkout should be triggered to mark the start of the checkout process;
If the user has entered a coupon code, it should also be included in the DataLayer. Of course, it is recommended to create a custom event to record just this action with the entered coupon code.
Here is a sample DataLayer for the “begin_checkout” event.
// Clear the previous ecommerce data
window.dataLayer = window.dataLayer || [];
window.dataLayer.push({
  ecommerce: null
});

// Push begin_checkout event with relevant data
window.dataLayer.push({
  "event": "begin_checkout",
  "ecommerce": {
    "currency": "USD",
    "value": 28.00,
    "coupon": "SUMMER_FUN",
    "items": [
      {
        "item_id": "SKU_12345",
        "item_name": "Google Eco Tee White",
        "affiliation": "Google Merchandise Store",
        "discount": 0,
        "index": 0,
        "item_brand": "Google",
        "item_category": "Apparel",
        "item_category2": "Adult",
        "item_category3": "Shirts",
        "item_category4": "Crew",
        "item_category5": "Short sleeve",
        "item_variant": "SM",
        "location_id": "product_detail_page",
        "price": 28.00,
        "quantity": 1
      }
    ]
  }
});
Step 6. Enter Shipping Info – User fills in shipping details.

An event called add_shipping_info should be triggered once the shipping details are entered by clicking the “UPDATE” button.
Here is a sample DataLayer for the “add_shipping_info” event.
// Clear the previous ecommerce data
window.dataLayer = window.dataLayer || [];
window.dataLayer.push({
  ecommerce: null
});

window.dataLayer.push({
  "event": "add_shipping_info",
  "ecommerce": {
    "currency": "USD",
    "value": 28.00,
    "coupon": "SUMMER_FUN",
    "shipping_tier": "Delivery",
    "items": [
      {
        "item_id": "SKU_12345",
        "item_name": "Google Eco Tee White",
        "affiliation": "Google Merchandise Store",
        "discount": 0,
        "index": 0,
        "item_brand": "Google",
        "item_category": "Apparel",
        "item_category2": "Adult",
        "item_category3": "Shirts",
        "item_category4": "Crew",
        "item_category5": "Short sleeve",
        "item_variant": "SM",
        "location_id": "product_detail_page",
        "price": 28.00,
        "quantity": 1
      }
    ]
  }
});
Step 7. Enter Payment Info – User enters payment details.
*This step typically has the second-highest dropout rate as users may hesitate to complete the purchase.
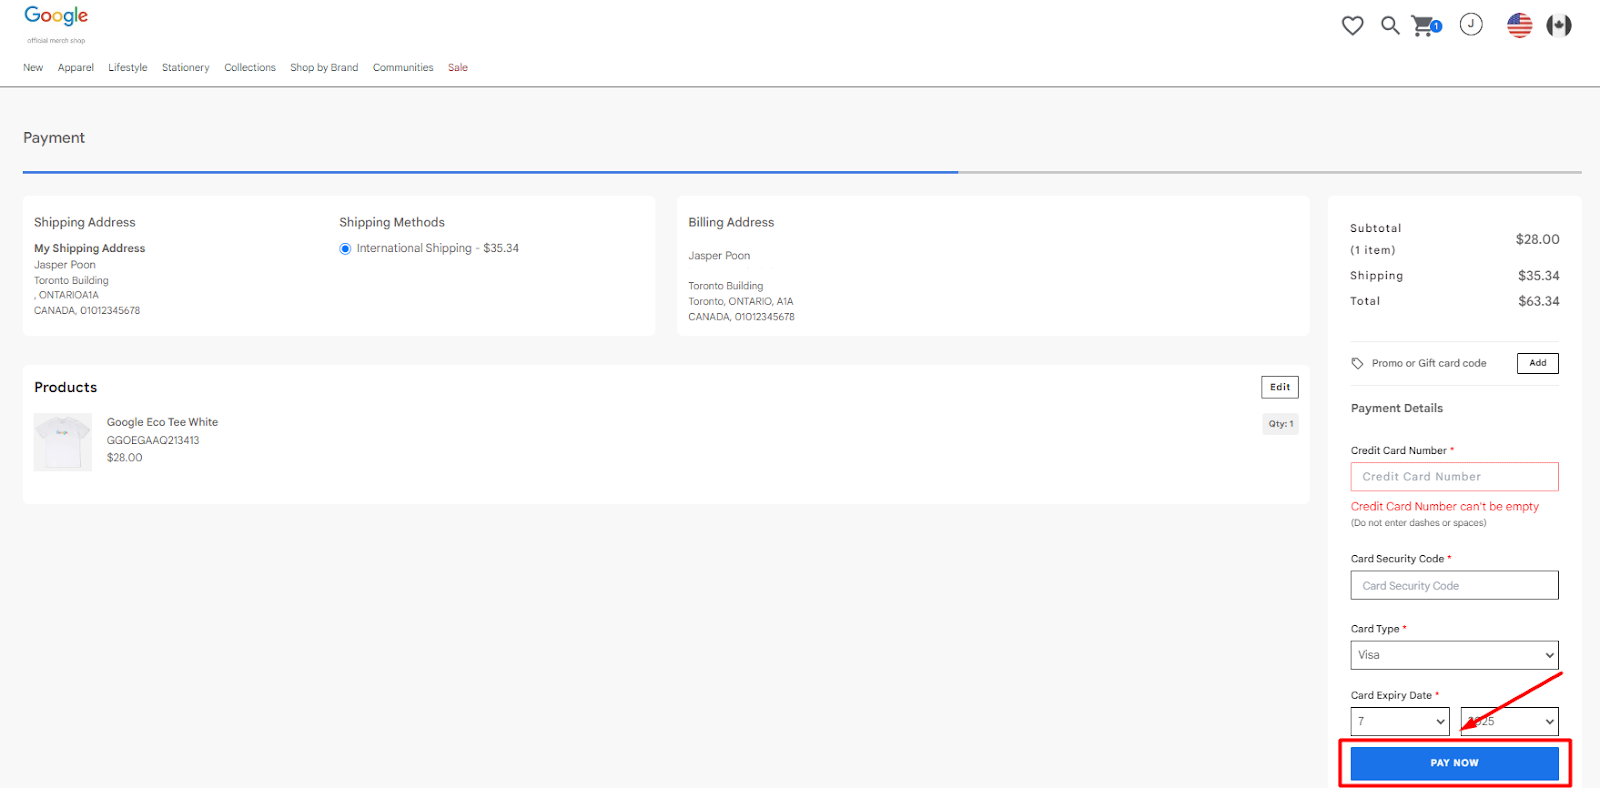
An event called add_payment_info should be triggered once the payment method is confirmed by clicking the “PAY NOW” button.
Here is a sample DataLayer for the “add_payment_info” event.
// Clear the previous ecommerce data
window.dataLayer = window.dataLayer || [];
window.dataLayer.push({
  ecommerce: null
});

window.dataLayer.push({
  "event": "add_payment_info",
  "ecommerce": {
    "currency": "USD",
    "value": 28.00,
    "coupon": "SUMMER_FUN",
    "shipping_tier": "Delivery",
    "payment_type": "Credit Card",
    "items": [
      {
        "item_id": "SKU_12345",
        "item_name": "Google Eco Tee White",
        "affiliation": "Google Merchandise Store",
        "discount": 0,
        "index": 0,
        "item_brand": "Google",
        "item_category": "Apparel",
        "item_category2": "Adult",
        "item_category3": "Shirts",
        "item_category4": "Crew",
        "item_category5": "Short sleeve",
        "item_variant": "SM",
        "location_id": "product_detail_page",
        "price": 28.00,
        "quantity": 1
      }
    ]
  }
});
Step 8: Successful Purchase – Payment goes through, and purchase is complete. (or Step 9)
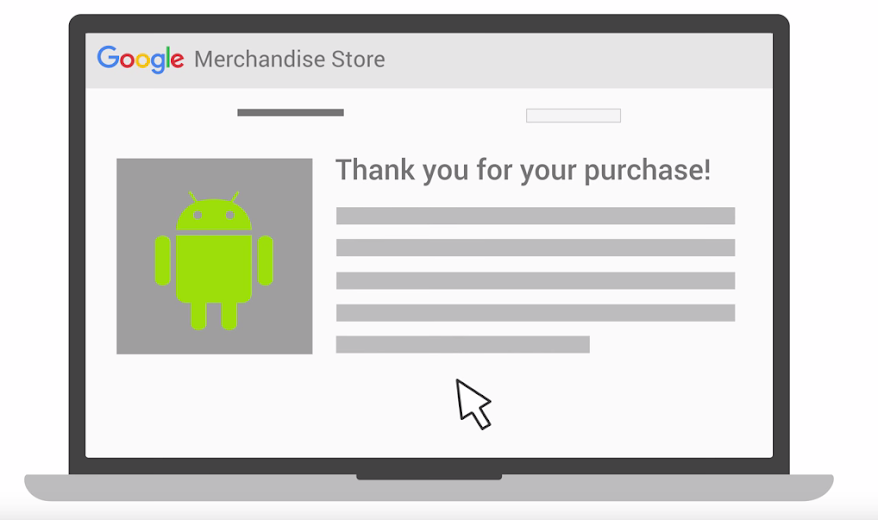
An event called “purchase” should be triggered once the order is confirmed and the thank-you page is loaded.
Here is a sample DataLayer for the “purchase” event.
// Clear the previous ecommerce data
window.dataLayer = window.dataLayer || [];
window.dataLayer.push({
  ecommerce: null
});

window.dataLayer.push({
  "event": "purchase",
  "ecommerce": {
    "transaction_id": "T_12345", // Transaction ID. Required for purchases and refunds.
    "value": 32.00, // Sum of (price * quantity) for all items.
    "tax": 0,
    "shipping": 33.99,
    "currency": "USD",
    "coupon": "SUMMER_FUN",
    "shipping_tier": "Delivery",
    "payment_type": "Credit Card",
    "items": [
      {
        "item_id": "SKU_12345",
        "item_name": "Google Eco Tee White",
        "affiliation": "Google Merchandise Store",
        "discount": 0,
        "index": 0,
        "item_brand": "Google",
        "item_category": "Apparel",
        "item_category2": "Adult",
        "item_category3": "Shirts",
        "item_category4": "Crew",
        "item_category5": "Short sleeve",
        "item_variant": "SM",
        "location_id": "product_detail_page",
        "price": 28.00,
        "quantity": 1
      }
    ]
  }
});
Step 9. Failed Purchase – Payment fails, and purchase isn’t completed.
An event called “transcation_failure” should be triggered once the order is unsuccessful, including the error message and payment type. This allows marketers to identify the reason for the unsuccessful payment and take appropriate action.
While this is not an official eCommerce event in Google Analytics 4, I recommend businesses implement this for comprehensive tracking.
Here is a sample DataLayer for the “transcation_failure” event.
window.dataLayer.push({
  "event": "transaction_failure",
  "error_code": "0001",
  "error_message": "Credit Card Number is not valid",
  "payment_type": "Credit Card"
});
Step 10. Post-Purchase – User may request a refund if unhappy with the product.
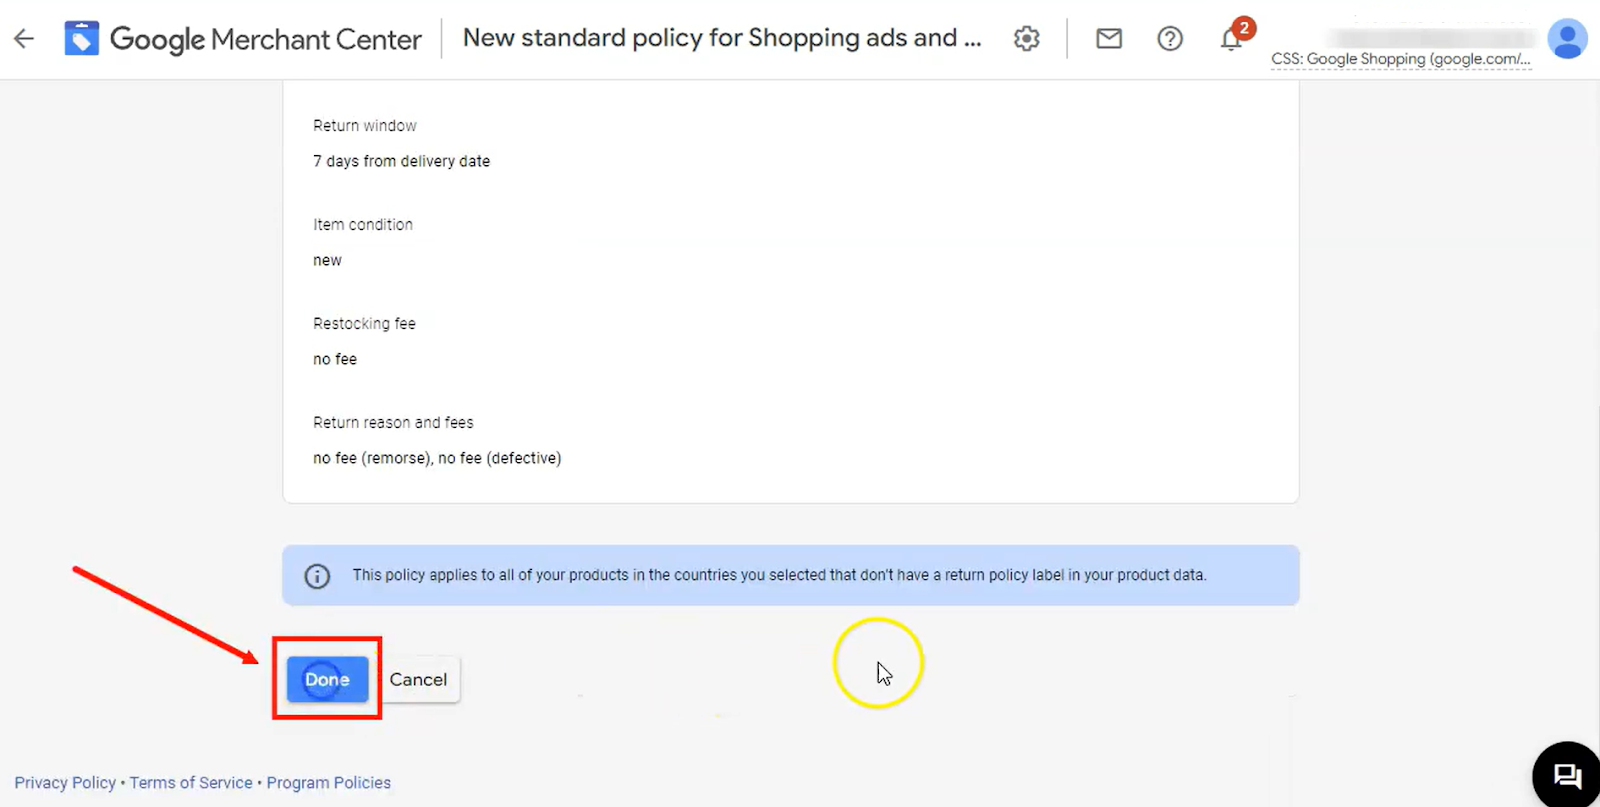
An event called “refund” should be triggered once the refund request is submitted by clicking the “Done” button, including all entered refund request details.
Here is a sample DataLayer for the “refund” event.
// Clear the previous ecommerce data
window.dataLayer = window.dataLayer || [];
window.dataLayer.push({
  ecommerce: null
});

window.dataLayer.push({
  "event": "refund",
  "ecommerce": {
    "transaction_id": "T_12345", // Transaction ID. Required for purchases and refunds.
    "value": 32.00,
    "tax": 0,
    "shipping": 33.99,
    "currency": "USD",
    "items": [
      {
        "item_id": "SKU_12345",
        "item_name": "Google Eco Tee White",
        "affiliation": "Google Merchandise Store",
        "discount": 0,
        "index": 0,
        "item_brand": "Google",
        "item_category": "Apparel",
        "item_category2": "Adult",
        "item_category3": "Shirts",
        "item_category4": "Crew",
        "item_category5": "Short sleeve",
        "item_variant": "SM",
        "location_id": "product_detail_page",
        "price": 28.00,
        "quantity": 1
      }
    ]
  }
});
Summary of User’s eCommerce Journey
| Step | Stage | Action | Associated Events |
| 1.1 | Initial Visit | The user visits the homepage to view the top promotions. | view_promotion |
| 1.2 | If they know what they want, they use the navigation bar to go directly to the product list page. | navigation_click *custom event | |
| 2 | Product List Browsing | The user views the list of items. | view_item_list select_item |
| 3 | Product Interaction | The user views the product details and either adds the item to the cart or saves it to the wishlist for later. | view_item add_to_cart add_to_wishlist |
| 4 | Cart Review | The user reviews the shopping cart to confirm their items. | view_cart add_to_cart remove_from_cart |
| 5 | Shipping Information | The user enters their shipping information. | add_shipping_info |
| 6 | Payment Information | After filling in the shipping details, the user adds their payment information. | add_payment_info |
| 7.1 | Purchase Outcome | If all goes well with the payment gateway, the purchase is successful. | purchase |
| 7.2 | If there are issues with the payment gateway, the purchase may not be successful. | transcation_failure *custom event | |
| 8 | Post-Purchase | If the user is dissatisfied with the product, they may request a refund. | refund |
Conclusion
Google Analytics 4 is a powerful tool when every measurement point is meticulously implemented. Again, establishing a comprehensive DataLayer is not easy, often requiring 3-6 months depending on complexity and scale.
However, in my view, without robust data, any optimisation or enhancement effort remains merely speculative.
With a well-structured DataLayer, not only can you refine your optimisation strategies, but you can also enhance the precision of your advertising campaigns. Data may never be the solution itself, but it can certainly enable precise decision-making.
In my next blog, I will discuss how to view the eCommerce report on Google Analytics 4 using the GA4 property of Google Merchant Store.